BEGINNER'S CROCHET HOW TO: CHAIN AND STITCH ROW ZERO ON ONE SIDE OF THE CHAIN
I recommend you use a 4mm or 5mm crochet hook and 2 or 3-ply yarn.
KNOTTED LOOP
Knot a Fixed gap onto your hook
CHAIN
Chain your chain with Chain Stitch
CHAIN STITCH
YOU HAVE A KNOTTED LOOP ON THE HOOK
1. Wrap a bar of string around your hook and secure it under the hook tip
2. Let the loop on the hook slide up the hook towards the tip
3. Slide that loop on the hook over the hooked bar of string and off into the air. You have a new loop on the hook.
4. Slide the new loop down to the middle of your hook and relax.

2. Let the loop-on-the-hook slide up the hook towards the tip
3. Slide that loop-on-the-hook over the hooked bar of string and off into the air
Above. Chain One complete, you have a new loop-on-the-hook
Congratulations. You have performed your first chain stitch. Chain one is complete.
CHAIN TWO
1. Repeat the steps of Chain one in exactly the same manner. You will have a new loop on the hook.
DO!
Chain a longer Chain!
1. Keep chaining until you feel you've got the hang of it.
UNDO
Crochet is the most versatile method of putting gaps through gaps to make a lattice of gaps not only because it is formed one stitch at a time but also because it Undoes one stitch at a time. If you are lost or have made a mistake, it is simple to undo a few stitches to see what has gone on back there, or what you should do here. REMEMBER TO ALWAYS KEEP THE STRING BEHIND THE WORK! This also means that once you have completed Row Zero of Stitch, you can put aside your unfinished body of work at any time without fear that you will lose any stitches unintentionally, let alone, as in knitting, the whole damn row or more!
DO!
UNDO!
1. Remove your hook from the gap on the hook and leave it down.
2. From behind the work, pull on the string in your direction of travel.
3.Have a close look at what is happening.
4. Try putting your hook back into a gap of the chain before you undo it completely, and chain a few more chains.
5. Now remove your hook and undo your chain as far as it goes.
6. You should be back to your Fixed Gap or knotted loop at the end of your string.
Congratulations. You have deleted your body of work, a chain.
CHAIN 10!
1. Chain ten chain stitches!
Congratulations, you have completed the body-of-work Chain 10.
CHAIN ONE TO TURN
Once you have chained (N) number of chains the pattern calls for, IF you are taking the traditional first track of gaps down the left side of the chain THEN you need to Chain one extra chain stitch to turn. This is called "Chain One To Turn"
DO!
1. Chain One To Turn! Your Chain has eleven chains.
THE TURN
now you will turn so that you can stitch into the chain and lay Row 0 of Stitch. If you are right handed, turn to your left. You will be stitching into one gap of your tenth chain stitch. The eleventh chain is unavailable to stitch on this track. If you try to stitch into it nothing happens; it is only there so that you can turn and stitch into the final stitch of your chain, chain 10.
Can you see a left-hand track of gaps?

NOTE WELL!
I AM RIGHT-HANDED: MY DIRECTION OF TRAVEL IS ALWAYS TOWARDS MY LEFT
IF YOU ARE LEFT-HANDED ,YOUR DIRECTION OF TRAVEL IS ALWAYS TO YOUR RIGHT
STITCH
ALWAYS KEEP YOUR BALL OF STRING BEHIND THE WORK!!!!!
ROW ZERO OF STITCH
Now we will stitch into a track of single gaps in your chain and raise the height of the work. You will be laying a track of Paired Gaps behind you as you go. This track of Paired Gaps is where you will stitch the next row, Row 1, when you get to the end of Row Zero.
HOW TO CROCHET STITCH
There are many kinds of crochet stitch. The basic crochet stitch is called Single Crochet Stitch, and is abbreviated as Scr.
SINGLE CROCHET STITCH
YOU HAVE A CHAIN AND A GAP ON THE HOOK
SINGLE CROCHET STITCH INTO THE CHAIN PART A.
1. Find your gap in the chain
2. Insert your hook from front to behind,
3.hook a bar of string and 4. draw it through the gap towards you and 5.keep it on the hook.
6. You have two loops or gaps on the hook. Relax
1. find the gap
2. Insert your hook through the gap from front to behind
4. draw the bar of string through the gap towards you

5. Keep it on the hook.
6. You have two loops on the hook, bring them down to the middle of your hook and then Relax
SINGLE CROCHET STITCH PART B
7. Hook another gap by wrapping a bar of string around your hook at the hook tip and
8. draw that bar of string down through both gaps-on-the-hook, which then go off into the air.
9. bring your new loop down to the middle of your hook to keep it secure and then relax.
You have one gap on the hook. Stitch complete.
7. Wrap a bar of string around your hook at the hook tip
8. keep the bar of string under the hook tip as you move the two loops-on-the-hook up to go over it
9. Pull the hook down towards you as the two loops go off the hook, and then let your new loop slide down to the middle of your hook. Relax.
Pictured Below: You have one new loop on the hook.
Congratulations. Your Single Crochet Stitch into chain gap point one is complete.
DO!
Continue stitching into the chain!
Find your gap and Repeat the steps, single crochet stitch into your chain, at point 2 of the chain.
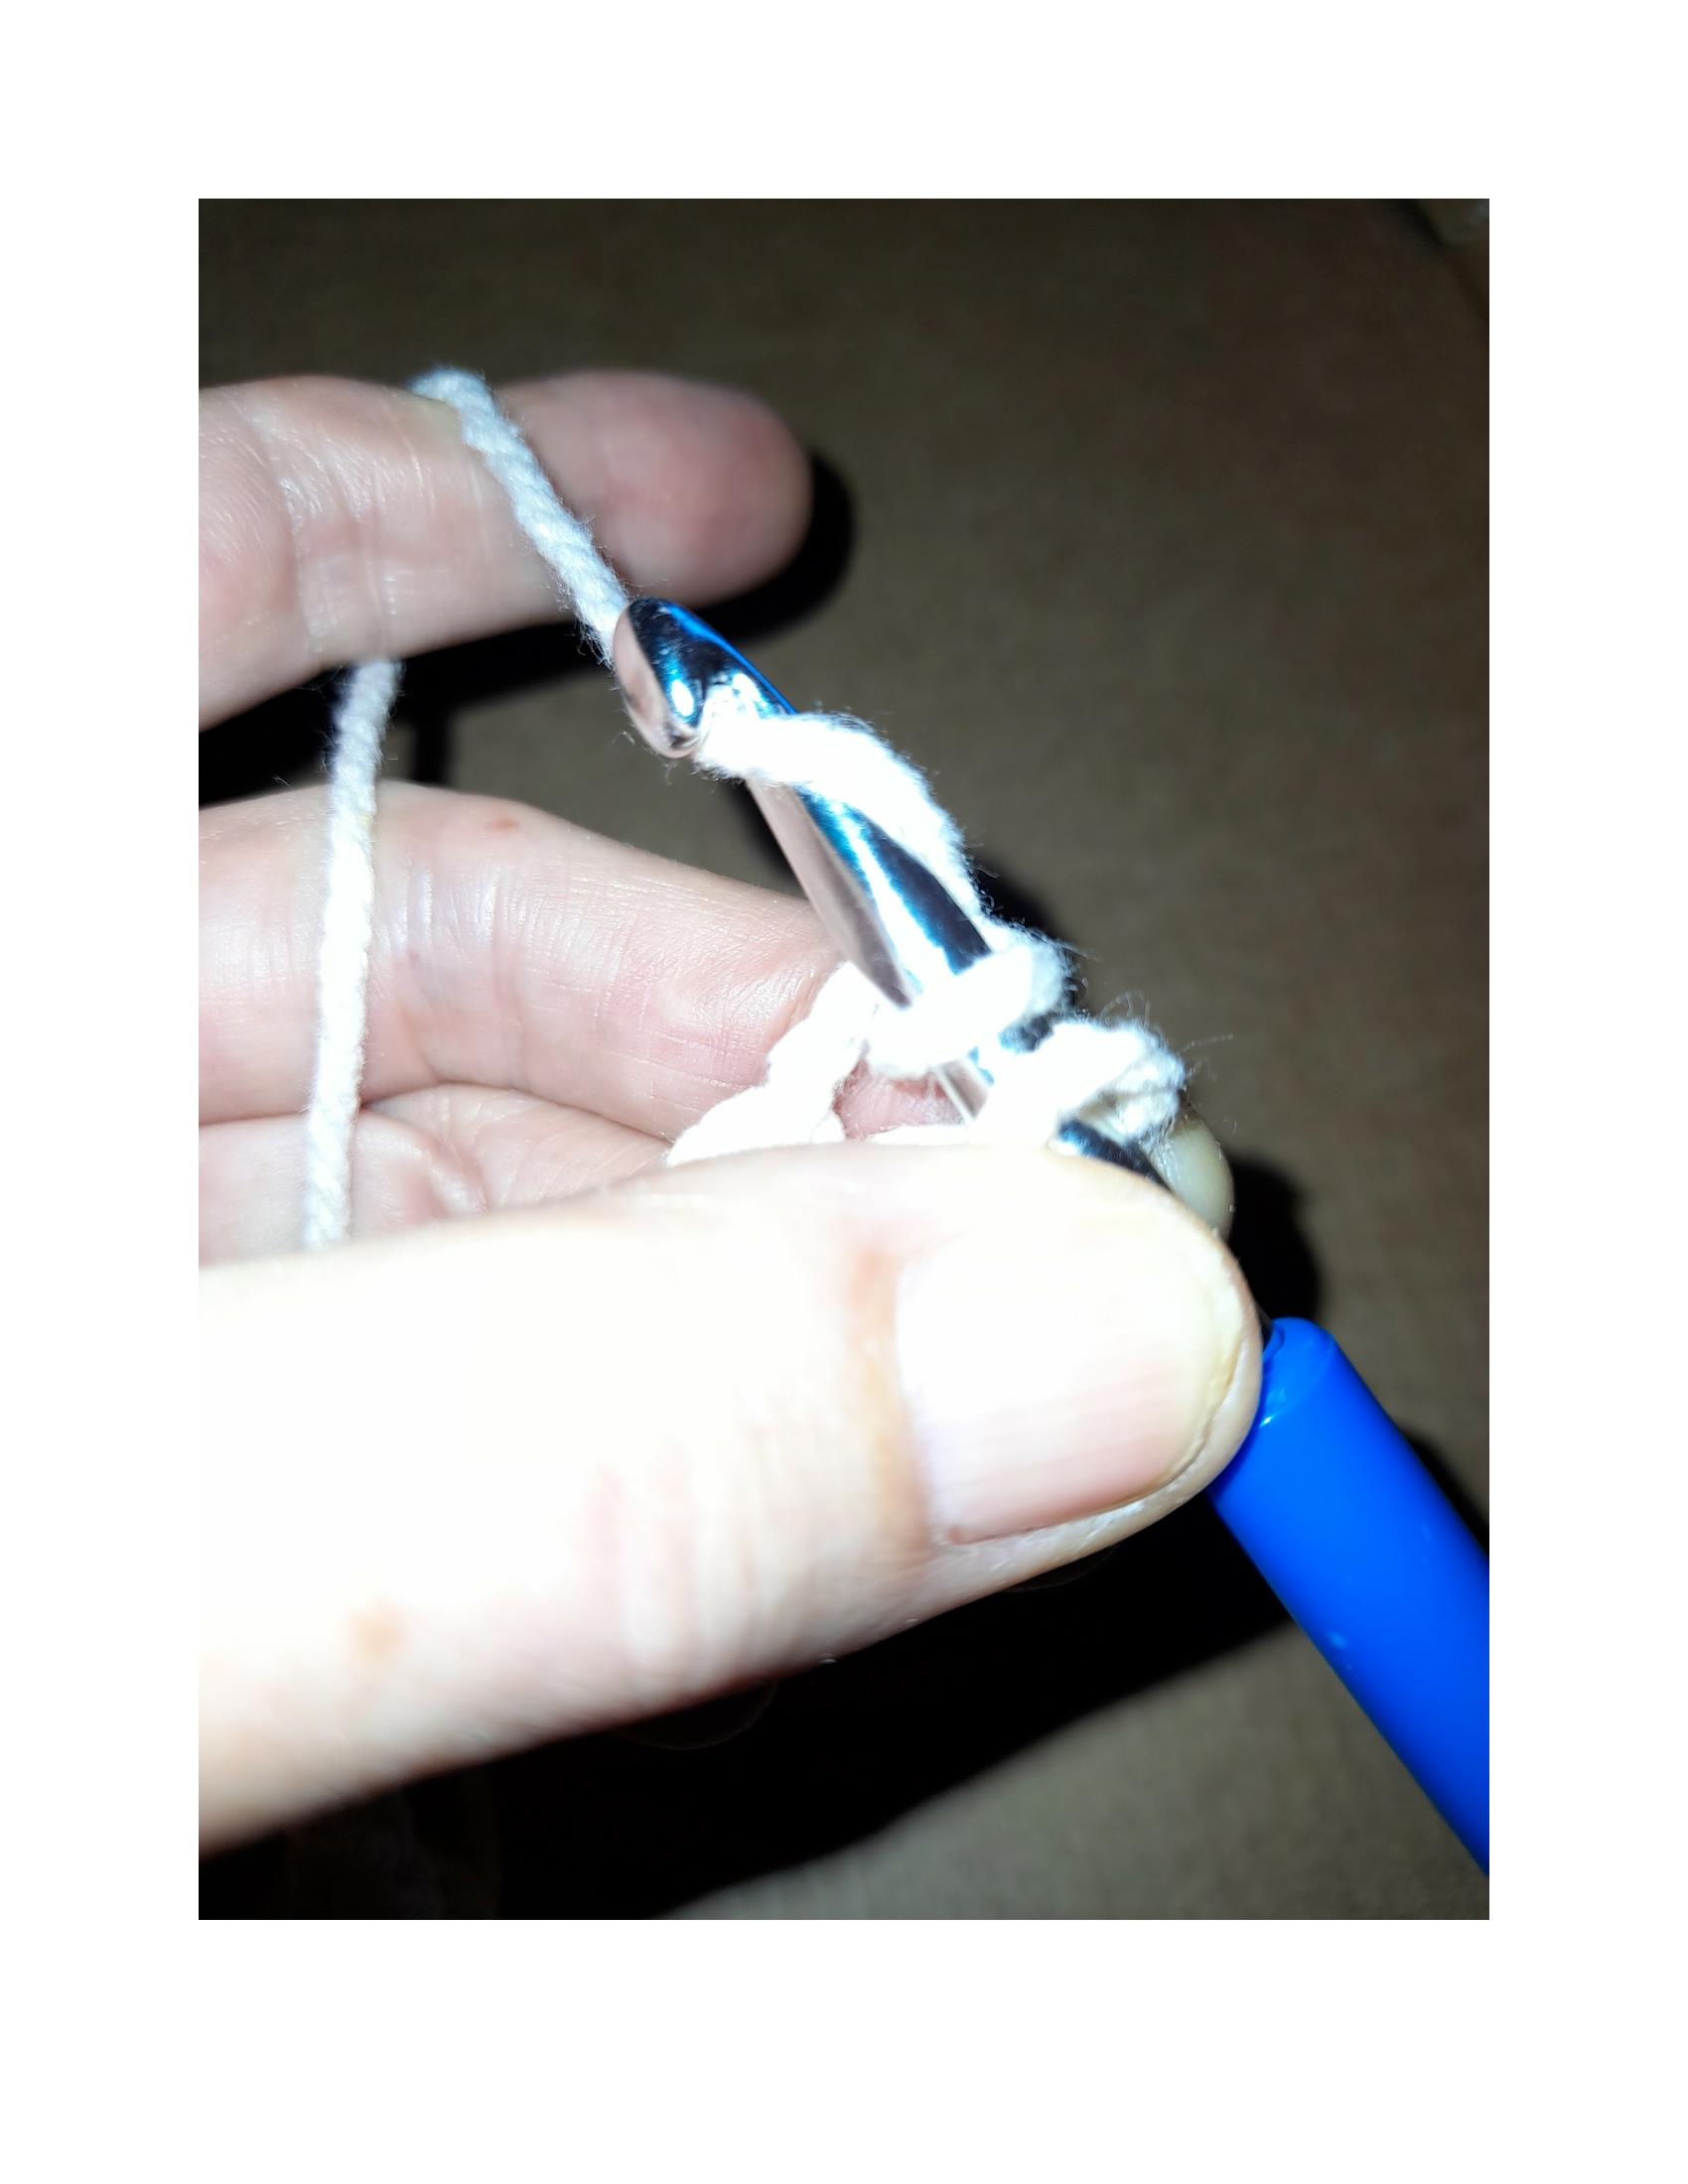
Hidden directly under my thumb is the next gap of the chain you will crochet stitch. It is point 2.
DO!
1. Stitch a Single Crochet Stitch into the next gap of your Chain, at Point 2, exactly how you did at point 1.
Continue stitching one Single Crochet Stitch into every next adjacent gap of your chain, until you get to the end. And Remember: Always Keep the String Behind the Work! and Keep to your Direction of Travel!
When you have Stitched each gap of the track marked above and reached the end of your chain, then Row Zero is almost complete. Row Zero is not complete until you Turn and stitch your first stitch of Row 1 into Row 0.
MARKING STRINGS
I use Marking Spiders and Marking Strings. Marking Strings are short snippets of different-coloured string or thread, inserted into a chain gap in order to mark important points, so I don't get lost.
DO! Hook short strands through gap 1 and 10 of your Chain! You can tie each of them in a bow or just wrap it around the top bar of the gap a couple times.
A LITTLE BIT MORE NOW, IF YOU LIKE
(If you want to get ahead of us on your own before I get round to publishing, try tieing those two bows and their points together to make a ring, after you have stitched Row Zero. The ring will have 2 circular edges, one of which will be the track of paired Gaps layed down by Row Zero...(( UNLESS YOU GO TWISTED!!)) ...You can then Scr into each consecutive Pair-of-Gaps which was layed down by Row Zero, starting at (subset of) point 1).
REMEMBER! ALWAYS KEEP THE STRING BEHIND THE WORK!
STUCK? Leave a stick. Leave a comment.
STUCK? Pause. Relax. Use your senses. Where did you just come from? Are you getting ahead of yourself?
STUCK? Take it one step at a time. Pause, Relax, Havva cuppa tea.
COMING SOON: BEGINNERS CROCHET 2. HOW TO: CROCHET STITCH AFTER ROW ZERO


Comments
Post a Comment